This page lists changes to RescueRigger version 5. The most recent version is 13.1.
You can also:
To learn which version you own, choose "Check for Updates" on RescueRigger's Gear (or Insert) toolbar.
RescueRigger version 5.0 was a major upgrade. See a quick summary of the changes here or scroll down to read about the new features.
More Gear
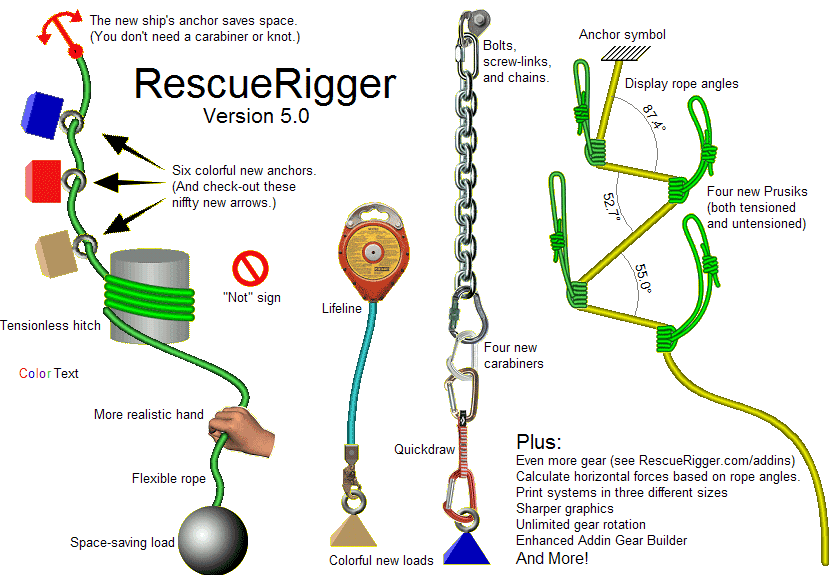
Version 5.0 adds 65 new pieces of gear. That brings the total number of items to 143.

Ropes can now be curved using "rope benders" to better illustrate untensioned sections of rope. The curves created by rope benders require Windows 2000, Windows NT, Windows XP, or Windows Vista.
When you upgrade to version 5.0, be sure to press F1 to learn more about rope benders.
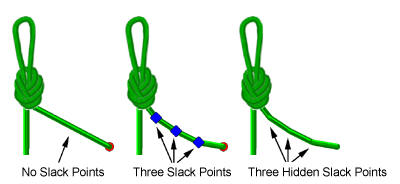
"Slack points" (which are shown below) can also be used to create curves in ropes. They work in any version of Windows. Slack points let you simulate curved rope by displaying a series of short, straight lines.
In the three knots shown below, the first tail does not have any slack points, the second tail has three slack points, and the third tail has the three slack points hidden. (The slack points are automatically hidden when you copy or print the workspace.)
Again, be sure to press F1 when using RescueRigger version 5.0 to learn about rope benders and slack points. These feature can make your RescueRigger illustrations look even more realistic.
Smooth Rope
Ropes are now displayed with smoother, more realistic shading. The new ropes required require Windows 2000, Windows NT, Windows XP, or Windows Vista. If you are running an older version of Windows, the ropes will appear as in previous versions.

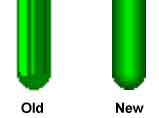
Sharper Graphics
The graphics have been improved significantly. This is especially true when
 the gear
is small (e.g., when you zoom the workspace to a low percentage or when you reduce the size of individual pieces
of gear).
the gear
is small (e.g., when you zoom the workspace to a low percentage or when you reduce the size of individual pieces
of gear).
The example graphics to the right show both the old and new graphics.
As with many of the changes to version 5.0, the improved graphics require Windows 2000, Windows NT, Windows XP, or Windows Vista.
Versatile Rotation
The rotation of gear has been improved so you can rotate gear to any arbitrary angle. Previous versions restricted the rotation to 22.5° increments.
When rotating gear with your mouse, pressing the Shift key will constrain the angles to 15° increments. (A program option allows you to reverse the behavior of the Shift key.)
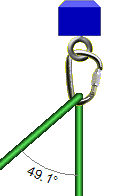
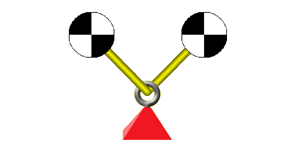
You can now solve for horizontal, as well as vertical, forces. This means that RescueRigger considers the angles of every rope! This is especially helpful with highlines and anchors.
You can enable the calculation of horizontal forces by clicking on the
 button on the toolbar or from the Options dialog.
When horizontal forces are enabled, you can display the angle of a rope by holding your mouse over the rope or by choosing Show Rope Angles from the View menu.
If the angle between ropes exceeds the "critical angle" of 120°, the angle is displayed in red.
The Forces page of the Properties dialog now displays up/down and left/right forces.
For more Information regarding horizontal forces, press F1 while running RescueRigger and choose Horizontal Forces from the index.
Enhanced Gear Builder
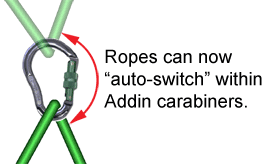
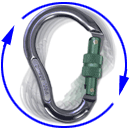
An "Auto-switch rope" check box was added to the Ropes page of the Gear Builder. This allows the rope to "move" within the gear as shown to the right (which is similar to the existing built-in carabiners).
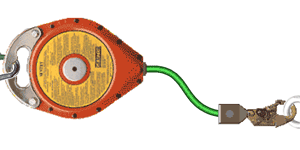
A new "connects to end of rope only" check box was added to the Ropes page of the Gear Builder. This allows gear such as the retractable lifeline and winches to be added.
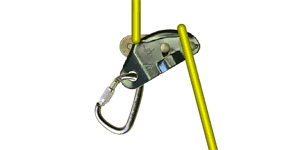
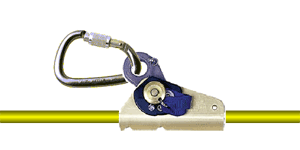
A new "ratchet device" check box was added to the Gear Builder. This check box helps you create Prusiks and ascenders that solve correctly with the new horizontal force calculations.
You can specify if the gear makes a "whooshing" or "clicking" sound when it connects to other gear.
The maximum number of gear items that can be installed was increased from 50 to 150.
A problem in the Grigri where the rope entered/exited incorrectly was corrected.
A problem in the Gibbs Ascender where the carabiner did not connect correctly was corrected.
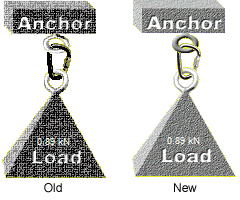
Two gear connections can now be made to the bottom of gear created with the Gear Builder. Previous versions only allowed one gear connection.
Many more pieces of gear are now included when you install RescueRigger.
Colored Text
Graph Paper Appearance and Alignment
RescueRigger's background can now be displayed as graph-paper-like grid. And a new command instructs RescueRigger to "snap" gear to the nearest gridline. This is helpful when you want to align gear.
The Show Grid and Snap to Grid commands are available in the View menu and are explained in the Help file (press F1).
Other Improvements
